

DIY truck drawers, part three: finishing touches.
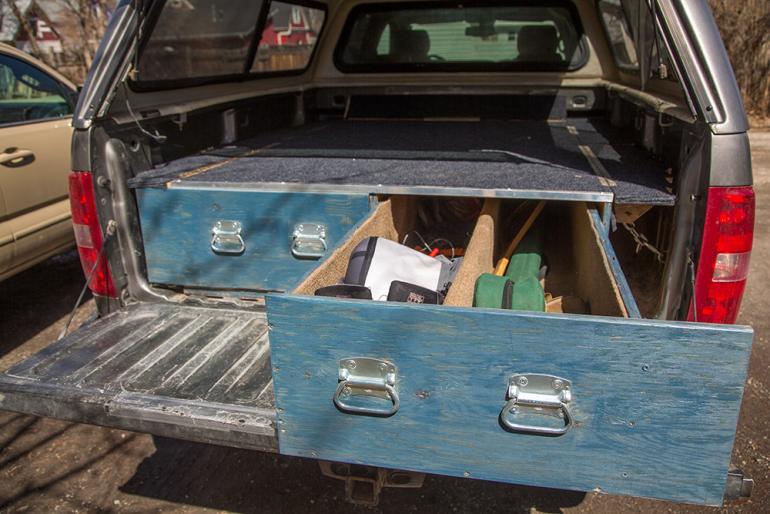
To my (and my wife's) surprise, my DIY truck drawers work pretty well—so after several weeks of use, I figured it was time for some final touch-ups. The first thing was to stop the drawer box from sliding around in the back (I left some space for storage). To keep it from sliding toward the cab, I put a spacer between the cab and drawer box. Then I added a U-bolts to each side of the drawer box and looped chains to the bed from the U-bolts to keep it from sliding side to side. (The U-bolts had to be placed in the top half-inch of the drawer box to avoid interfering with the drawers.)

Next up was installing carpet on the top and inside the drawers. All-weather carpet was one of the only items I couldn’t find at Kenyon Noble, but I’ve seen it in stock there before. I bought two pre-cut 6’ x 8’ carpets, one for the top and one for the insides. I stapled an edge and then glued the carpet down. To keep it as tight as possible, I pushed a 1x4 from the center to the edge and stapled the excess down on the side. For the drawers, I only used staples and made it as tight as possible by pushing the 1x4 into the corners and stapling. It may be easier to carpet the drawers prior to putting them together, but my method seems to have worked all right. I also carpeted a large divider that runs down the middle of one drawer, but all the smaller ones are still wood.
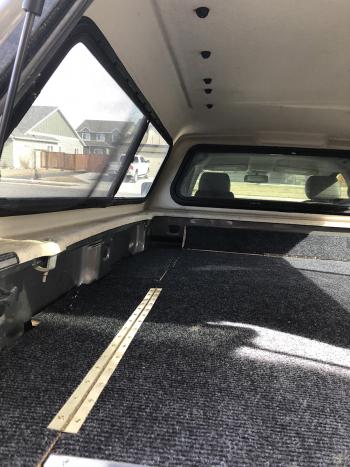
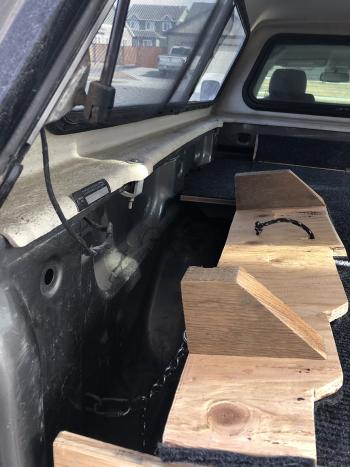
Then I needed to tackle the open space between the drawer box and the sides of the truck bed. To fill the space, I used a straight board and cut a 45-degree edge along one side. This way it sits at an angle and I can keep taller items in there, such as my scoop shovel. I used a cardboard template to replicate the non-linear wall for all three sides of the truck bed.

Knowing these side covers would add some weight of their own, I attached 2x4s to the bottom side, carpet to the top, and ran a rope through a hole for a handle. (I had to cut extra space off the covers so they would clear the topper clamps.) I used piano hinges to attach each cover to the top of the box.
The final step was staining the front and sides of each drawer. I was hoping to match the color of the stain to the carpet but didn’t do the best job there. I also added a piece of angled aluminum to the front edge of the truck box to help keep the carpet down and wood covered.
All in, the project was three trips to Kenyon Noble and right around $550. The largest expense, which was about half the cost, was the five sheets of plywood (all other lumber was scrap I had around the garage). It took me, a novice DIYer, two solid weekends of work, plus many hours of planning. But now I'm done and can use them to keep all my safety and recreational gear at the ready. I guess it’s time to go fishing.